Category Archives: February 2012 - Page 3

10th February – Chocolate fondant

Ingredients (serves 4):

  • 150g of unsalted butter – cut up into cubes to help with melting
  • 1 heaped tablespoon of plain flour
  • 150g of dark chocolate – broken into pieces to help with melting
  • 3 large eggs
  • 75g of caster sugar
  • Cocoa powder or icing sugar for dusting

Pre-heat the oven to 200 degrees C.  Thoroughly grease the inside of 4 ramekins with butter on the sides and the base.  Sprinkle some flour over them and shake out any excess.  Use one of the ramekins as a template and cut out 4 circles of greaseproof paper to go into the bottom of the ramekins.  Lightly grease and/or flour the greaseproof paper.

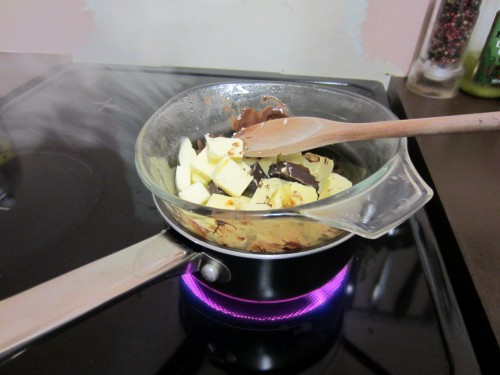
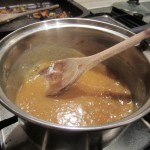
Pour some boiling water into a small pan and rest a heatproof glass bowl, with the chocolate and butter in, on the pan making sure the bowl doesn’t touch the water.  Stir the butter and chocolate every now and then until totally melted and smooth.  Once smooth remove from the heat and allow to cool for a couple of minutes.

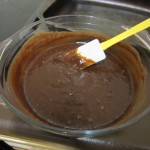
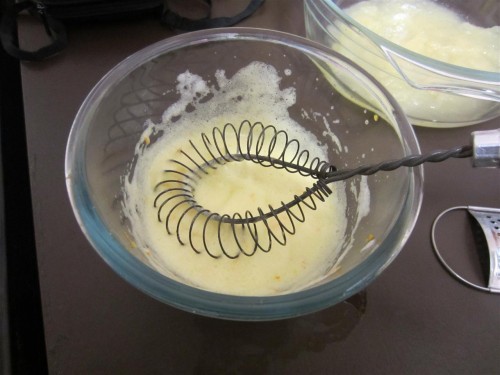
Whilst the chocolate and butter mix is cooling down you need to whisk together the eggs and sugar in a large mixing bowl.  Whisk in the chocolate and butter mix into the eggs and sugar until well combined.  Sprinkle the flour over the top and fold in gently.

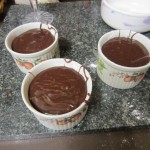
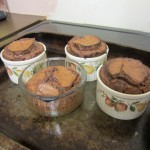
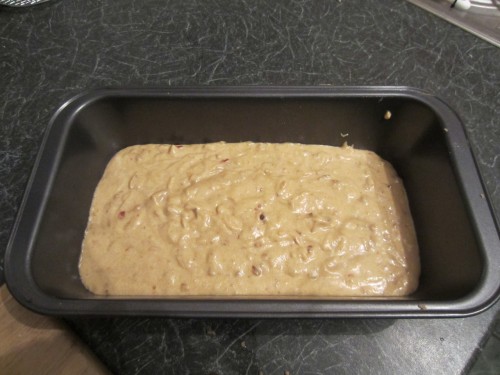
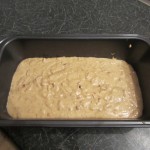
Divide the mixture between the ramekins making sure that you leave a centimetre or so gap to the top of the ramekins.  Place the ramekins onto a baking tray and into the hot oven for 10-15 minutes.  They should rise up a bit.  The fondants should be firm on the sides but still soft in the centre.  It may take a few tries at this with your oven to get the timing spot on (mine could have done with a minute or so more to make them perfect).

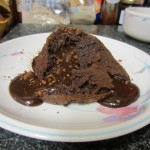
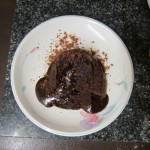
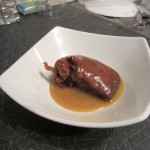
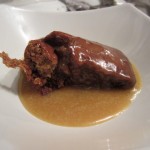
To serve, run a butter knife around the edge of the ramekins, place a plate on top and turn both the plate and the ramekin over together.  Hopefully the fondant should slide out onto the plate!  Remove the greaseproof paper from the top of the fondants and serve straight away with some cream if you like.  The perfect fondant should hold it’s shape until cut into with a spoon, revealing the rich and juicy chocolate centre.

Slide 1
Slide 2
Slide 3
Slide 4
Slide 5
Slide 6

9th February – Sticky toffee pudding and toffee sauce

Ingredients:

Pudding:

  • 85g dates – roughly chopped
  • 45g unsalted butter
  • 85g light brown sugar
  • 1 egg
  • 1 tsp bicarbonate of soda
  • 115g plain flour
  • 1 tablespoon vanilla extract

Sauce:

  • 85g unsalted butter
  • 150g demerera sugar
  • 4 tablespoons of double cream

Start by pre-heating an oven to around 180 degrees C.  Next, get a bowl and add in the chopped dates and pour over enough boiling water to just cover them.  Allow these to sit whilst you do the rest of the prep.  Start the pudding mix by creaming the butter and sugar together in a large mixing bowl.  (‘Creaming’ means to firstly whisk some butter that’s at room temperature until it starts to whiten and is smooth.  Once it’s whitened you then add in the sugar and continue whisking until it’s fully combined and starting to go light in texture).  You then need to whisk in the egg and about 1/3rd of the flour and continue adding the flour until it’s all gone.  Add the bicarbonate of soda and vanilla extract to the dates and stir briefly before adding into the main mix and whisking/stirring until fully combined.  Pour the mixture into an oven proof dish/tin and cook in the oven for 30-40 minutes until it’s well rise and just browning on the top.  A good test is to put a wooden skewer into the cake and remove it; if it’s cooked it should come out clean!  About 5 minutes before the cake is done you’ll need to make the sauce as below:

Put a pan on a hob and add in the butter and stir until nearly melted then add in the sugar and the cream.  Keep on a heat that is hot enough to melt the ingredients together but not so hot that it burns it.

Once the pudding is done remove it from the oven and serve up with a good helping of the toffee sauce!  Enjoy!

Slide 1
Slide 2
Slide 3
Slide 4
Slide 5

8th February – Chinese style stir-fried rice

Ingredients (serves 4-6):

  • 250g of cooked and peeled prawns
  • 1 large mushroom – finely chopped
  • 2-3 tbsp groundnut oil
  • 2 medium sized onions – peeled and finely chopped
  • 1 pack of thin cut bacon – sliced roughly into 1/2″ squares
  • 50g peas
  • 3 eggs, lightly beaten
  • 3 spring onions – finely chopped
  • 1 tablespoon Japanese soy sauce
  • White basmati rice measured up to 350ml level in a measuring jug
  • 1 tsp salt

You’ll need to firstly cook the rice and allow it to cool to room temperature before starting the main cooking.  To do this add a little oil to a pan and fry the onions for 3-4 minutes until they just start to brown.  Add in the rice and stir around for a minute or so until evenly coated with oil and the onions are nicely distributed.  Add enough boiling water to just cover the rice by about 1/2 inch (a good rule is to have the rice:water in a 2:1 ratio in terms of height in the pan).  Give the rice a stir just once and then cover with a lid and allow to simmer for 15 minutes until all of the water has gone.  Try not to stir the rice as this will make it sticky.  Remove the rice from the pan to a large plate and allow to completely cool.

Once cooled you need to get a wok on the heat and add in some oil along with the diced bacon and onions.  Cook these whilst stirring for 3-4 minutes before adding in the prawns, peas and mushroom to the wok.  Continue stirring the mixture for another minute or so before adding in another drizzle of oil.  After a few seconds add in the rice evenly.  Stir for another minute so that the rice is heated through and nicely distributed.  Next, get some chopsticks and pour the lightly beaten eggs over the entire surface of the mixture and start stirring it with the chopsticks.  Do this for a minute or two until the egg has cooked and has broken off into small pieces.  Finally add in the spring onions and soy sauce and give it a final stir for 10-20 seconds.  Serve up straight away!  Enjoy!

Slide 1
Slide 2
Slide 3
Slide 4
Slide 5

7th February – Tandoori chicken and chips

Ingredients:

  • 4 chicken drumsticks – skin removed
  • Groundnut oil
  • 30g of melted butter
  • 1/2 onion – finely chopped
  • 2 cloves of garlic – crushed and finely chopped
  • 1cm cube of ginger – grated
  • 2 tablespoons of lemon juice
  • Dash of salt
  • 1 teaspoon of chilli powder
  • 1/2 teaspoon of garam masala
  • Dash of tumeric

Start by piercing the chicken drumsticks all over with a sharp fork and put them to one side.  Combine the onion, garlic, ginger, lemon juice, chilli powder, garam masala and tumeric and blend with a food processor (I had to make do with mushing it all together with the end of a rolling pin!).  Get a container or oven dish and add in the chicken one piece at a time whilst pouring over and rubbing in the marinade.  Cover the dish or seal the container and leave for preferably 24 hours in the fridge to marinate nicely.

When you’re ready to cook, pre-heat an oven to around 200 degrees C, either remove the chicken from the container and place into an oven dish or simply uncover the oven dish.  Brush half of the melted butter over the top of the chicken, which should now be nicely marinated.  Put into the oven for about 20 minutes initially and then remove and brush with the rest of the melted butter before re-entering the chicken into the oven for another 10-20 minutes (dependant on your oven) until it has nice charred coloured skin.  You could pan fry on a high heat to crispen up the skin some more if necessary.

As I’d been to a Snow Patrol gig tonight and I didnt get in and start cooking until gone 11pm I just decided on some chips as a side!

Slide 1
Slide 2
Slide 3
Slide 4

6th February – Sticky chicken drumsticks with salad

Ingredients:

  • 4 chicken drumsticks
  • 1 tablespoon of soy sauce
  • 1/2 tablespoon of honey
  • 1/2 tablespoon of olive oil
  • 1/2 teaspoon of tomato puree
  • 1/2 teaspoon of dijon mustard
  • Salad

Mix up the soy sauce, honey, olive oil, tomato puree and mustard in an oven dish big enough to accommodate the chicken.  Once you’ve mixed the marinade, add the chicken drumsticks in one at a time and ensure they’re thoroughly coated.  Cover with cling film and allow to marinate for at least half an hour.

Once you’re ready to cook the wings, pre-heat an oven to around 180 degrees C, remove the cling film and put them in after a quick stir around.  Keep turning them every ten minutes until they’re nice and golden on the outside; normally 30-40 minutes!

Simply dress a plate with some salad dashed with balsamic and put the drumsticks on top, not wasting any of the leftover juices.  You could have fries, bread or rice with this if you want some carbs!  Enjoy!

Slide 1
Slide 2
Slide 3
Slide 4
Slide 5

5th February – BBQ chicken burger with chips and salad

Ingredients (serves 2):

BBQ sauce

  • 2 tablespoons of ketchup
  • 2 tablespoons of brown sauce
  • Dash of chilli flakes
  • 1 teaspoon of clear honey
  • 1 or 2 garlic cloves (finely sliced and crushed)

Other

  • 2 chicken breasts
  • 2 bread buns of your choice
  • 2 rashers of bacon
  • A few leaves of lettuce
  • 1 tomato (sliced)
  • 1 red onion (sliced)

Start by mixing up the BBQ sauce.  Make a slice into each of the breasts as if you were cutting a bread roll in half, making sure you don’t cut all the way through.  Spoon around half the mixture into the middle of the chicken breasts.

You can either pan fry, oven cook or BBQ the chicken breasts.  As there was snow on the ground I chose to go for the oven method.  Cook the chicken on a fairly high heat until cooked and finish under the grill to give a nice crisp outer layer.  Slice the onion into rings and the tomato into slices while the chicken is cooking.  Just before the chicken is done, fry the bacon until nice and crispy and also slightly toast the sliced bread buns under the grill.

Build the burger by first putting one side of the bun on your plate, then the chicken, the bacon, the leftover sauce, then the onion, tomato and lettuce leaves.  Serve with chips to make an indulgent treat!

Slide 1
Slide 2
Slide 3

4th February – Peppered Lamb chops with mash and veg

Ingredients (serves 2):

  • 4 thick cut lamb chops
  • 2 teaspoons of ground black peppercorns
  • 1 teaspoon of dried thyme
  • Dash of salt
  • 1 tablespoon of olive/sunflower oil
  • 1 medium onion
  • 190ml of lamb stock
  • 1 tablespoon of redcurrant jelly
  • 1 knob of unsalted butter
  • Potatoes
  • Cream, butter and milk for the mash
  • Veg of your choice

Bring a pan of water to boil for the potatoes.  Then cover the lamb chops on both sides with a small grind of salt and the peppercorns and thyme.  Heat up a pan and add in some oil and cook the lamb chops on a medium heat for 6-8 minutes either side.  If they’re really thick chops, a few minutes in the oven may be needed as you don’t want the outside too charred.  When you turn over the chops put the peeled and sliced potatoes into the boiling water with a dash of salt.  Once the lamb is cooked remove from the oven/pan and cover in tin foil to allow the meat to rest.

Bring another pan of water to the boil to cook or steam your veg. Add this in so that it’s ready for when the other things are.

Add the finely chopped onion to the pan you cooked the lamb in and cook for a few minutes until slightly browned.  Add in the lamb stock and redcurrant jelly and simmer until the mixture is reduced by half (around 5 minutes).  It should go slightly sticky!  When the potatoes are cooked, mash them well with a knob of two of butter, some cream and milk.  Before serving up whisk a knob of butter in to the lamb stock and redcurrant sauce to increase the richness.

Serve with the mash and some veg.  Enjoy!

Slide 1
Slide 2
Slide 3
Slide 4
Slide 5

3rd February – Apple and orange fluff

Ingredients (serves 2):

  • 2 medium sized cooking apples (cored, peeled and sliced)
  • 45g caster sugar
  • 1 egg white
  • Grated zest of 1 orange

Add the apples and sugar to a pan with 75ml of water, bring to the boil then reduce the heat and simmer, stirring occasionally, for 10-15 minutes until very soft.  Sieve the mixture into a bowl and allow to cool.  Use a wooden spoon to push the mixture through the sieve.

Once cooled you need to whisk 1 egg white until you can form peaks; it took me about 5 minutes with a fairly rubbish whisk!  Add in half of the orange zest to the egg white and whisk for another 30 seconds, which should make the mixture take on a nice tint of orange/yellow.

Now, pour the egg whites into the apple mixture and fold together until perfectly consistent.  Serve into bowls/glasses and top with some more orange zest.  You can eat it straight away or refrigerate it for later.

A really refreshing dessert!

Slide 1
Slide 2
Slide 3

2nd February – American style pancakes with chocolate chips

I was going away with work for 2 days and getting picked up by a taxi at 7:30am so today was an early start to make some pancakes for breakfast on the train!

Ingredients (to make 8-10 pancakes):

  • 120g plain flour
  • 1 1/2 tea spoons of baking soda
  • 1/2 tea spoon of salt
  • 2 tea spoons of sugar
  • 1 egg
  • 250ml milk
  • 50g of cream cheese
  • 1/2 tablespoon butter (slightly melted)
  • 1/2 teaspoon of vanilla extract
  • Chocolate chips

Start by mixing together the flour, baking soda, salt and sugar and then creating a well in the middle.  In another bowl add the egg, milk, cream cheese, melted butter and vanilla extract and whisk well for a minute or so.  Add about half of the milk mix into the well of flour and stir around a little.  Once it’s fairly consistent add in the rest of the milk mix and stir until it’s fully smooth.

Warm a good non-stick frying pan and add in a little of the mix into the centre of the pan.  After 5-10 seconds sprinkle in some chocolate chips if you like.  Cook until golden brown underneath (you should see tiny craters appearing on the top when it’s close to being cooked underneath) and turn over for approximately half the time it took to cook on the first side.  Once cooked, put to one side and start on the next one.  Repeat until all the mixture has gone.

Slide 1
Slide 2
Slide 3

1st February – Peppered steak with tagliatelle in a lemon cream sauce

Ingredients:

  • Sirloin, ribeye or rump steak
  • 1 tsp dijon mustard
  • 2 tbsp wholegrain mustard
  • 2 tbsp olive oil
  • 2 or 3 shallots (finely sliced)
  • 1 clove of garlic (crushed)
  • 2 tbsp of creme fraiche
  • Juice of 1/2 a lemon
  • Tagliatelle
  • Rocket salad
  • Grated parmesan
  • Salt and pepper

Start by putting a pan of water on to boil.  Whilst that’s heating up grind a good amount of pepper onto both sides of your steak and then rub in a tablespoon of wholegrain mustard onto both sides and finally add a little salt to both sides.  Heat a second pan up, add a little olive oil and cook the steak for a couple of minutes either side then remove to a plate.  Turn the temperature down on the pan you’ve just taken the steak out of and add a little more oil.  Put the pasta in the now boiling water to cook for 8-10 minutes.  Add in the shallots and garlic to the ex-steak pan and cook for 3-5 minutes being careful not to burn the garlic.  Add in the creme fraiche and the lemon juice along with the teaspoon of dijon mustard.  Keep this on a low to medium heat, stirring regularly.  Slice the steak up thinly, roughly 5mm thick. Once the pasta is cooked drain it off and return it to it’s pan.  Add in the sauce and stir around lightly for a few seconds.  Then add in the beef and stir again.  Finally, add in a handful of rocket salad and stir until everything is distributed evenly.

Serve straight away with some grated parmesan over the top to finish!  Lovely!


Slide 1
Slide 2
Slide 3
Slide 4
Slide 5