Author Archives: admin - Page 20

17th February – Banoffee pie

Ingredients (makes 8-10 good slices):
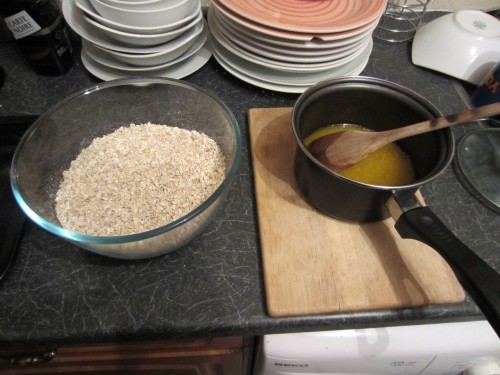
  • 300g Hob Nobs
  • 60g butter – melted
  • 397g tin condensed milk
  • 2 large bananas – sliced
  • 300ml double cream
  • 1 tbsp icing sugar
  • 100g dark chocolate

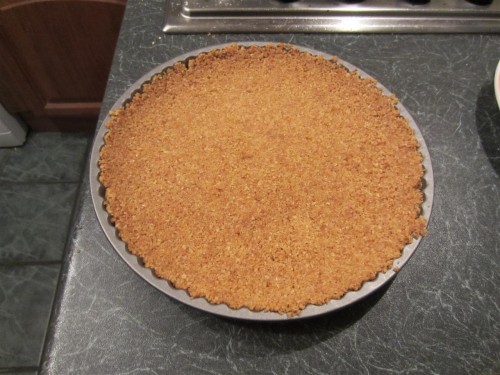
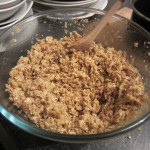
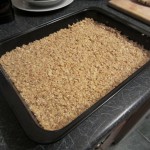
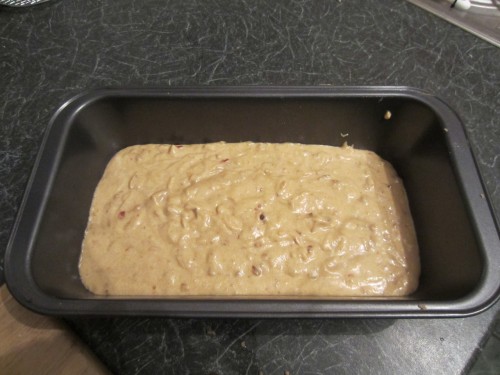
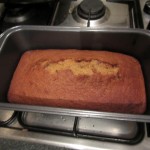
Start by pre-heating the oven to 180 degrees C.  While that is heating up you’ll need to break up the biscuits.  How you do this is upto you, you can blend, smash, crush, beat or whatever… just make sure they’re totally crushed and consistent! 🙂  Next, you’ll need to combine the biscuit crumbs with the melted butter.  Add it in a little at a time whilst stirring at the same time.  Once you’ve added all the butter and it’s nicely combined you’ll need to line a ~24cm tart tray with the mixture.  Make sure it’s even and padded down well.  Put it into the now hot oven for 10-12 minutes until lightly toasted and golden in colour.

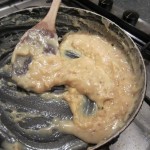
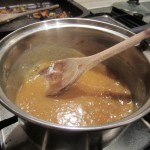
While the base is in the oven you well need to make the caramel.  This is done by heating the condensed milk over a low to medium heat and stirring constantly for 12-15 minutes.  A glass of wine by your side will speed along this process.  Remove the base from the oven and allow to cool.  You’ll need to keep stirring the milk until it turns a little gloopy and caramelised.  Once you’re happy with the caramel, remove it from the heat so it doesn’t cook any further.  Allow the base to cool to just above room temperature before carefully removing the outer ring of the tart tray.  Place the tart onto a serving plate or chopping board, smother it with the caramel evenly and place it (on the board/plate) into the fridge for at least 40 minutes to chill.

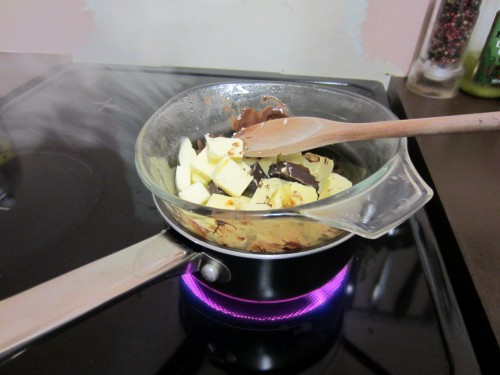
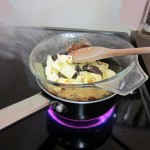
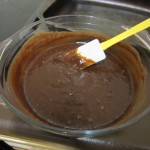
Just before removing the tart from the fridge, quickly whip together the sugar and cream until soft peaks appear.  Also melt the chocolate either in a glass bowl over a pan of boiling water or in the microwave on a medium heat, stirring regularly.  You’ll also need to peel and cut the bananas up into slices.

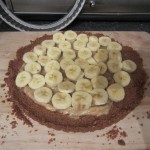
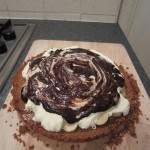
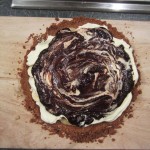
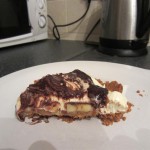
Remove the tart from the fridge and cover the top with the banana slices.  Cover the banana’s with the whipped cream.  Finally, add the melted chocolate.  You don’t need to use 100g if you just want a light drizzle but I thought I’d go the whole hog!  Leave to stand for 5 minutes to allow the chocolate to fully cool before tucking in!  Enjoy!

Slide 1
Slide 2
Slide 3
Slide 4
Slide 5
Slide 6

16th February – Braised beef in gravy

Ingredients (serves 2):

  • 4 small braising steaks
  • Sunflower oil
  • 1 large onion – cut into 8-10 wedges
  • 2 shallots – cut in half
  • 1 clove of garlic – crushed
  • 1 bay leaf
  • 1 beef stock cube
  • 1/2 teaspoon of thyme
  • Squeeze of tomato puree
  • 1 heaped teaspoon of dijon mustard
  • 2 heaped teaspoons of corn flour

Start by pre-heating an oven to around 160-170 degrees C.  Heat a pan up and add a little of the oil, then cook the steaks 2 at a time for a few minutes on either side.  Once cooked, place the steaks into a casserole dish and put the lid on.  Return the pan to the hob and reduce the heat.  Add a little more oil and add in the onions and shallots.  Stir them occasionally until they’ve got some nice colour on them and they’ve softened a little – around five minutes should do it.  Add in the clove of garlic and stir for a further minute.  Put the onion, shallot and garlic into the casserole dish with the beef.  Add the thyme, tomato puree and bay leaf.  Put the beef stock cube into a jug and add 500ml of hot water, stir until dissolved and add this to the pot too. Give it all a quick stir!

Place the casserole dish into the oven with the lid on for around an hour.  Remove it from the oven and add the mustard and corn flour and stir in well.  Return the dish to the oven once again with the lid on for a further 20-30 minutes.

Once that’s done it’s ready to serve.  You could do it with chips and peas or other veg but as it was getting late I just lightly toasted some bread.

Slide 1
Slide 2
Slide 3
Slide 4
Slide 5

15th February – Jess’ chicken and chorizo bean bake

This recipe was suggested to me by a friend so I thought I’d give it a go!

Ingredients (serves 2-3):

  • 5 or 6 boneless chicken thighs
  • 100g of chorizo sausage
  • 12 cherry tomatoes
  • 6-8 garlic cloves
  • 400g tin of butter beans
  • 300g tin of haricot beans
  • 1 heaped teaspoon of dried rosemary
  • Olive oil
  • Salt and pepper

Start by pre-heating the oven to 180 degrees C.  Whilst that’s warming up you’ll need to drain off the water from the tins of beans and prepare the other ingredients.  Chop the chorizo sausage into small bitesize chunks.  Finely slice the garlic cloves (yes, that’s 6-8 cloves! :)).  Slice the cherry tomatoes in half also.

Get an oven dish, pour in the beans and mix them together.  Next, distribute evenly around the dish the chorizo, garlic and cherry tomatoes.  Sprinkle over the rosemary; add as much as you prefer, and season well with salt and ground pepper.  Place the chicken thighs around the dish and finish off with a healthy covering of olive oil.  Cover the dish with tin foil and put into the oven for 25-35 minutes.  After the first phase of cooking you should remove the foil, give the ingredients a stir around and cook for a further 10-20 minutes without the foil covering.  Bake until the chicken is cooked to your preference.

You can serve it on it’s own or with rice or salad or in my case some nice bread, which I put into the oven for a few minutes before serving.

Enjoy!  Cheers Jess!

Slide 1
Slide 2
Slide 3
Slide 4
Slide 5

DIY Spice Rack

After six and a half weeks of cooking I’d amassed a rather large number of herbs and spices.  I’d looked at what spice racks were available and wasn’t happy with what I found.  Due to this I decided to make my own.  Grand total spent on materials was about £2 on wood and 16 panel pins.  What I’ve got is a spice rack that holds 20 jars and fits flush into my cupboard! 🙂 I may also make a few smaller ones that I can move around.

Slide 1
Slide 2
Slide 3
Slide 4
Slide 5
Slide 6

14th February – Coconut flapjack

Ingredients (makes 1/2″ thick 20cm x 30cm baking tray):

  • 330g porridge oats
  • 55g of desiccated coconut
  • 200g unsalted butter – cut into cubes
  • 6 tablespoons of golden syrup
  • Dash of salt

Pre-heat an oven to around 180 degrees C.  Rub butter around a roasting tray/cake tin (approximately 20cm x 30cm or smaller if you prefer a thicker flapjack) to grease it.  Mix the oats, coconut and salt in a large mixing bowl.  Put the butter and golden syrup into a pan and heat gently whilst stirring until the butter is fully melted into the syrup.  Pour about half of the syrup into the oats and mix in a little.  Add the rest of the syrup in and stir until the oats are fully coated with the mix.  Pour the mix out into the tray and spread evenly using a wooden spoon.  Put the tray into the middle of the oven for 20-25 minutes until golden brown but still slightly soft.  Remove the tray from the oven, cut the flapjack into squares and allow to cool to room temperature.  You can eat it straight away or store it in an airtight container and it’ll be good for several days.

Slide 1
Slide 2
Slide 3
Slide 4
Slide 5
Slide 6

13th February – Chilli con carne

Ingredients (serves 4-5)

  • 500g of lean beef mince
  • 1 good sized onion
  • 1 tablespoon of olive oil
  • 1 red pepper
  • 2 garlic cloves – finely chopped
  • 1 heaped teaspoon of chilli powder
  • 1 teaspoon of paprika
  • 1 teaspoon of ground cumin
  • 1/2 teaspoon of marjoram
  • 1 teaspoon of sugar
  • 2 tablespoons of tomato puree
  • 1 beef stock cube
  • 400g tin of chopped tomatoes
  • 400g tin of red kidney beans
  • Salt and pepper to season
  • 1/2 cup of white rice per person

Start by chopping up the onion, pepper and garlic.  Also open the tin of red kidney beans and rinse them out with cold water several times until the juices run nearly clear (it’s easy to do this if you almost fully open the tin with the tin opener, pour out the juices, fill the tin up with cold water and use the lid to stop the beans falling out when you pour out the water).

Put a pan on a medium heat and add in the oil and the onions and cook for 3-5 minutes, stirring regularly.  Next, add in the garlic, red pepper, chilli powder, paprika and cumin, give it a good stir and cook for a further 3-5 minutes stirring occasionally.  Increase the heat and add in the mince making sure to stir it around and make sure it’s fully broken up.  Keep cooking on a high heat until the mince is fully browned off.  Put the stock cube into a pouring jug, add 300ml of boiling water and stir until it’s fully disolved.  Add this along with the tinned tomatoes, marjoram, sugar, a good grind of salt and pepper and also a good squeeze of tomato puree to the mince.  Stir this around well for a minute or so and bring to the boil.  Once boiling, reduce the heat to minimum and allow to simmer for 20-30 minutes with a lid on the pan, stirring every 5-10 minutes.

Once the chilli has been simmering for 20-30 minutes add in the drained kidney beans and simmer for a further ten minutes.  You’ll need to keep tasting the sauce and seasoning if necessary.  I found I had to add quite a bit of salt to get the flavour spot on.  Also, when you put the beans in you should boil some rice to go with the chilli.  Put the rice into a pan and add enough water to cover the rice about about 1-2cm dependant on how much rice you put in.  Put a lid on the pan and allow the rice to steam cook until all the water has gone.  If, when the water has all boiled off, the rice is still needing a little more cooking, simply add in some more water and put the lid back on after a quick stir.  Try not to stir the rice too much as it’ll go mushy.

Serve up the rice in a circle and spoon a good helping of the mince into the middle of the plate.  Enjoy!

Slide 1
Slide 2
Slide 3
Slide 4

12th February – Pasta alla carbonara

Ingredients (Serves 2):

  • 250g of tagliatelle
  • 2 tablespoons of olive oil
  • 100-200g of bacon cut up into cubes or strips
  • 2 garlic cloves – lightly crushed
  • 2 large eggs
  • 40g of parmesan cheese
  • 40g of pecorino or other Italian cheese
  • Salt and pepper to taste

Start by putting a pan of water on to boil and finely grating the parmesan and pecorino cheese into a bowl.  Add the pasta to the water once boiling.  Meanwhile heat up another pan and add in half of the oil and after a few seconds add in the bacon and garlic, stirring constantly to avoid burning the garlic.  The bacon should go nice and crispy after 5 or 6 minutes.  Give the pasta a quick stir and check it isn’t cooked yet.  Once the bacon is cooked remove the garlic cloves as these were just for adding taste.  Beat the eggs and grated cheese together until consistent and add in a grind of salt and pepper.  Once the pasta is cooked drain it off and return it to the pan.  Add in the egg and cheese mix along with the bacon and the other half of the olive oil to the pasta and stir until it’s fully coated.  Serve straight away with another fine grind of cheese!

Slide 1
Slide 2
Slide 3

11th February – Herb crusted salmon with garlic new potatoes and veg

Ingredients (serves 2):

  • 2 salmon fillets
  • New potatoes
  • Mixed veg
  • 50g of breadcrumbs
  • 1 teaspoon of dill
  • 1 teaspoon of chervil
  • 1 teaspoon of parsley
  • 2 teaspoons of rosemary
  • Salt and ground pepper
  • 3 garlic cloves
  • 1 egg – lightly beaten
  • 2 tablespoons of olive oil

Pre-heat your oven to 180 degrees.  Put the new potatoes into a deep baking tray and sprinkle over the rosemary along with 2 crushed cloves of garlic and a drizzle of olive oil.  Place these into the oven once it’s upto temperature and shake them in the pan a couple of times over the course of them cooking.

Put the breadcrumbs, dill, chervil, parsley, salt, pepper and a sliced garlic clove into a flat bowl and mix together.  Heat a pan up and add a little olive oil.  Take each salmon fillet and coat in the beaten eggs before thoroughly coating in the breadcrumb mix and placing in the pan.  Fry skin side down for a couple of minutes before turning over for another minute.  Turn the salmon back over so that the skin is facing down and put the pan into the oven for 3-5 minutes.  Quickly boil the veg in lightly salted water, drain and allow a knob of butter to melt over the veg.

Serve everything up and enjoy!

Slide 1
Slide 2
Slide 3

10th February – Chocolate fondant

Ingredients (serves 4):

  • 150g of unsalted butter – cut up into cubes to help with melting
  • 1 heaped tablespoon of plain flour
  • 150g of dark chocolate – broken into pieces to help with melting
  • 3 large eggs
  • 75g of caster sugar
  • Cocoa powder or icing sugar for dusting

Pre-heat the oven to 200 degrees C.  Thoroughly grease the inside of 4 ramekins with butter on the sides and the base.  Sprinkle some flour over them and shake out any excess.  Use one of the ramekins as a template and cut out 4 circles of greaseproof paper to go into the bottom of the ramekins.  Lightly grease and/or flour the greaseproof paper.

Pour some boiling water into a small pan and rest a heatproof glass bowl, with the chocolate and butter in, on the pan making sure the bowl doesn’t touch the water.  Stir the butter and chocolate every now and then until totally melted and smooth.  Once smooth remove from the heat and allow to cool for a couple of minutes.

Whilst the chocolate and butter mix is cooling down you need to whisk together the eggs and sugar in a large mixing bowl.  Whisk in the chocolate and butter mix into the eggs and sugar until well combined.  Sprinkle the flour over the top and fold in gently.

Divide the mixture between the ramekins making sure that you leave a centimetre or so gap to the top of the ramekins.  Place the ramekins onto a baking tray and into the hot oven for 10-15 minutes.  They should rise up a bit.  The fondants should be firm on the sides but still soft in the centre.  It may take a few tries at this with your oven to get the timing spot on (mine could have done with a minute or so more to make them perfect).

To serve, run a butter knife around the edge of the ramekins, place a plate on top and turn both the plate and the ramekin over together.  Hopefully the fondant should slide out onto the plate!  Remove the greaseproof paper from the top of the fondants and serve straight away with some cream if you like.  The perfect fondant should hold it’s shape until cut into with a spoon, revealing the rich and juicy chocolate centre.

Slide 1
Slide 2
Slide 3
Slide 4
Slide 5
Slide 6

9th February – Sticky toffee pudding and toffee sauce

Ingredients:

Pudding:

  • 85g dates – roughly chopped
  • 45g unsalted butter
  • 85g light brown sugar
  • 1 egg
  • 1 tsp bicarbonate of soda
  • 115g plain flour
  • 1 tablespoon vanilla extract

Sauce:

  • 85g unsalted butter
  • 150g demerera sugar
  • 4 tablespoons of double cream

Start by pre-heating an oven to around 180 degrees C.  Next, get a bowl and add in the chopped dates and pour over enough boiling water to just cover them.  Allow these to sit whilst you do the rest of the prep.  Start the pudding mix by creaming the butter and sugar together in a large mixing bowl.  (‘Creaming’ means to firstly whisk some butter that’s at room temperature until it starts to whiten and is smooth.  Once it’s whitened you then add in the sugar and continue whisking until it’s fully combined and starting to go light in texture).  You then need to whisk in the egg and about 1/3rd of the flour and continue adding the flour until it’s all gone.  Add the bicarbonate of soda and vanilla extract to the dates and stir briefly before adding into the main mix and whisking/stirring until fully combined.  Pour the mixture into an oven proof dish/tin and cook in the oven for 30-40 minutes until it’s well rise and just browning on the top.  A good test is to put a wooden skewer into the cake and remove it; if it’s cooked it should come out clean!  About 5 minutes before the cake is done you’ll need to make the sauce as below:

Put a pan on a hob and add in the butter and stir until nearly melted then add in the sugar and the cream.  Keep on a heat that is hot enough to melt the ingredients together but not so hot that it burns it.

Once the pudding is done remove it from the oven and serve up with a good helping of the toffee sauce!  Enjoy!

Slide 1
Slide 2
Slide 3
Slide 4
Slide 5